
Step 1: Setup the resolution
You should go into your Android/iphone settings and change all the cameras to the 1080p resolution. Set it to 60 FPS as well!
Don’t forget to change the camera aperture to ‘0.5x’ (this is explained in the video below)
Step 2: Tilt Calibration
You will need to do some calibration, but once it is done you will NEVER have to do it again because you’ll always know the correct placement since you’ll know the distance and tilt needed for your phone.
1. Setup the camera in the normal horizontal position. Make sure that the rear camera is being used and it is closest to the floor.
2. Tilt the camera against the box to make the floor flush with the bottom frame. Now begin a 5 second video where you sit in front of the camera and then check your results. If it doesn’t look precisely like the Calibration Images on page 4-10, then adjust it more.
3. When you finally get the correct perspective, measure the distance (in cm) from the box to the phone camera. Now, no matter where you film you will always know how much tilt is required for the view to be flush with the floor!
Step 3: Distance Calibration
Now that you know how much tilt is required, you will need to know how close you can get before your feet are cut off by the field of view. You want to get your feet as close as possible during a sole display.
This is around the area where you will smash the bugs as well.
1. Set up the camera and sit in the position to show your feet to the camera, starting at around 30 cm from the camera
2. Keep adjusting from there until you reach the Calibration Image on Page 4-10
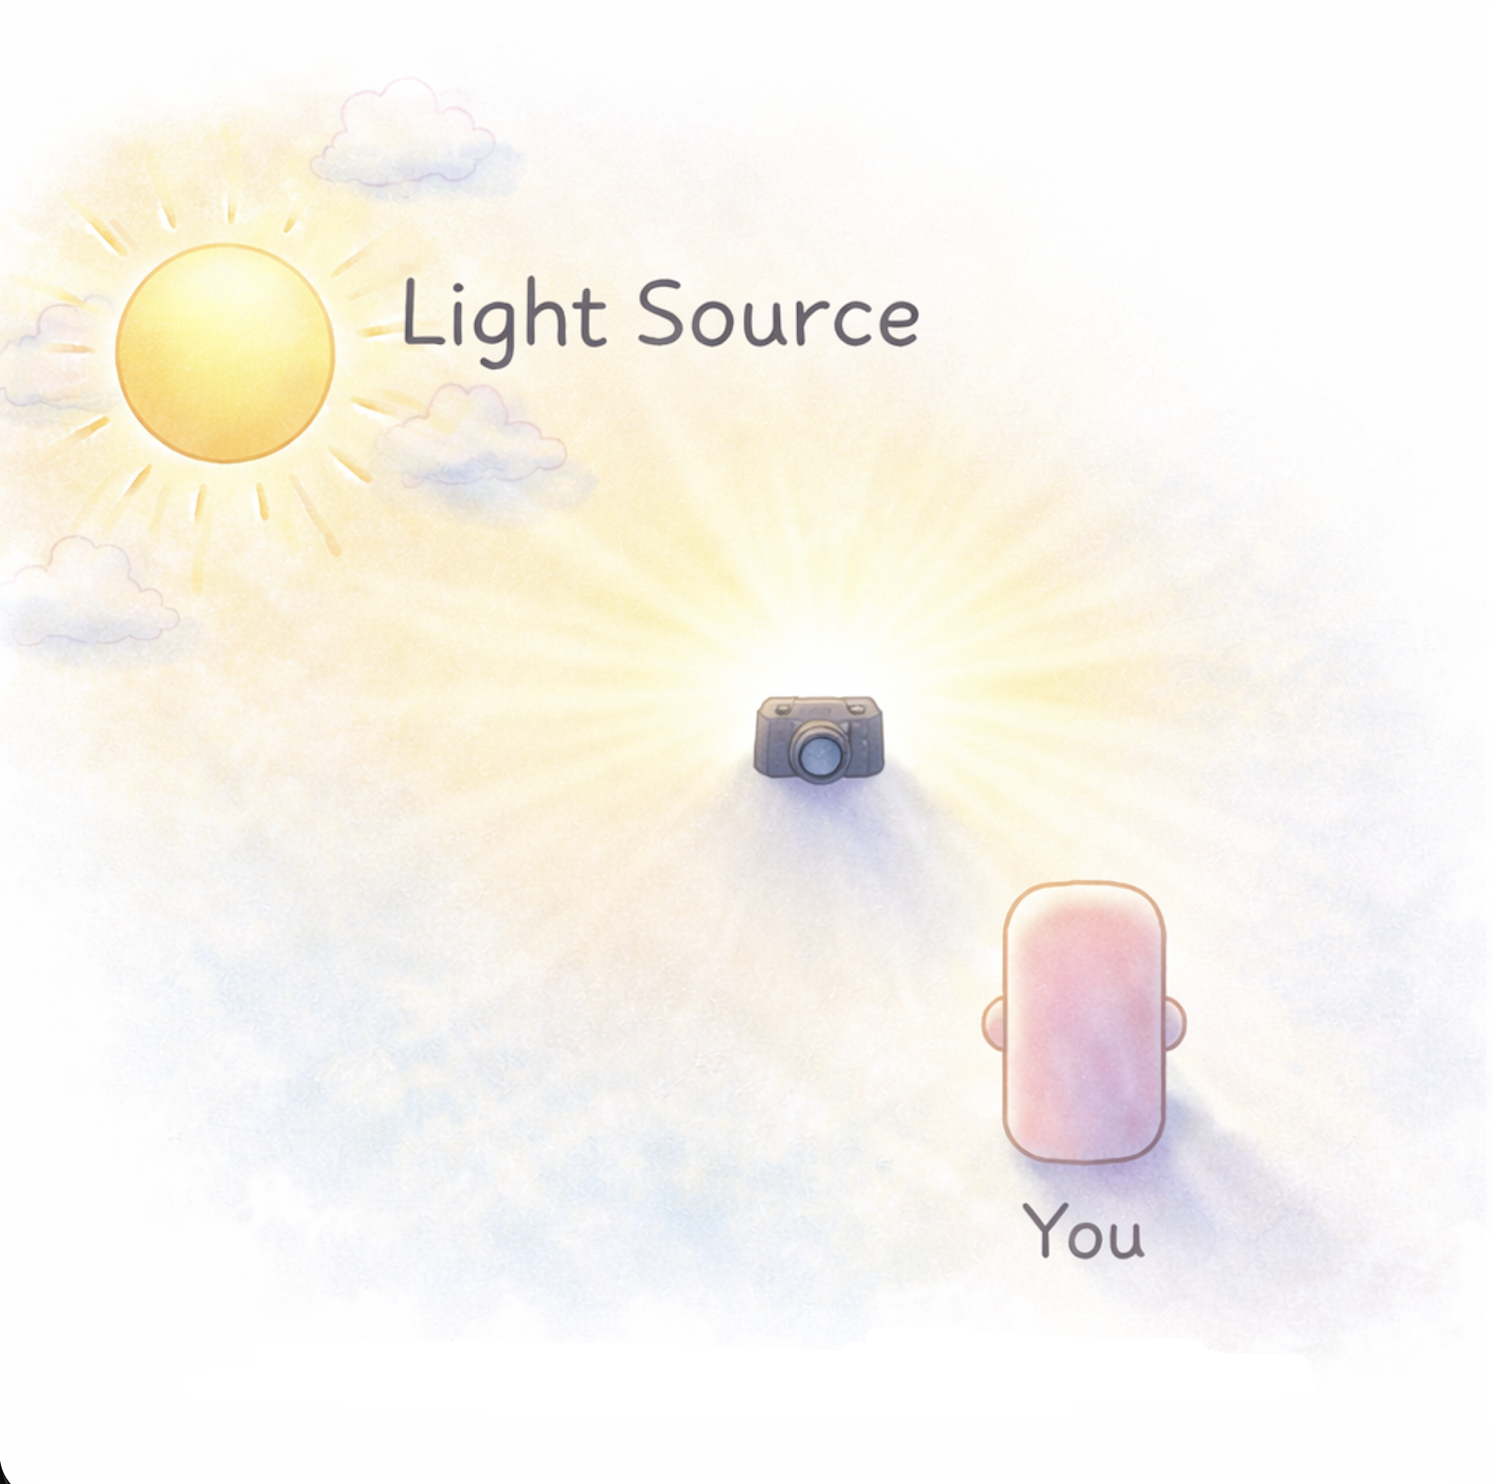
Step 4: Film in a Place with Better Light
You want to use natural light in your videos as much as possible, so if you are near a window with sunlight please use it whenever possible. The sunlight or other light source should always come from BEHIND the camera. This will guarantee good results and a good view. See the crude picture below:
Now that you have done these four steps, you should be able to do all videos properly.